
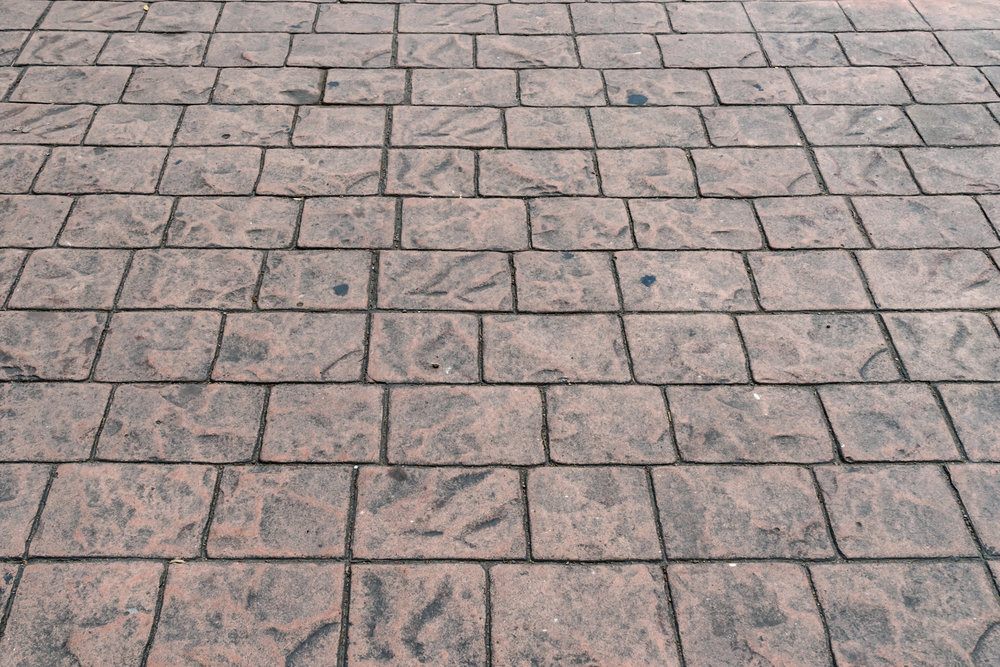
STAMPED CONCRETE
Since stamped concrete is one of our most popular services, we’ve created this page to help guide you along the process.
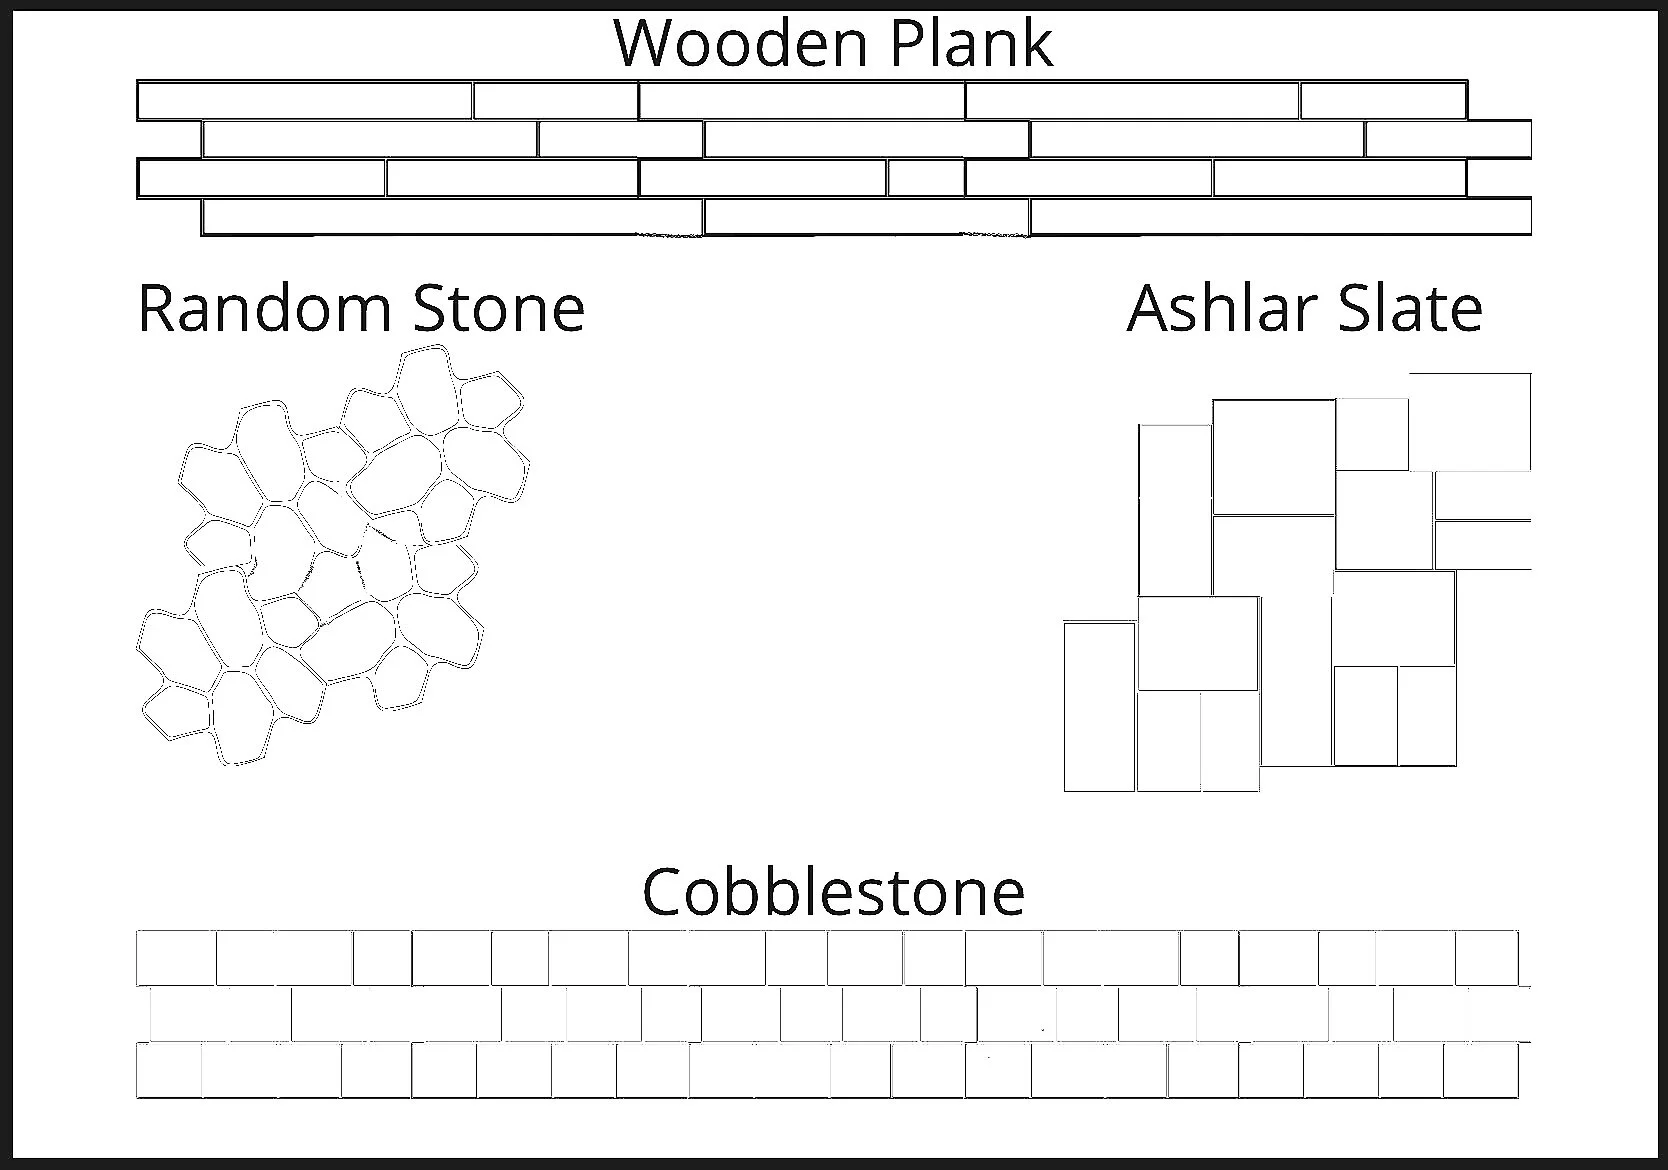
Step 1: Choose a stamp pattern.
It all starts with choosing a stamp pattern that you like. This will be the mold that is used to give the concrete the look and texture that you want. Four of our most popular patterns are Random Stone, Cobble Stone, Ashlar Slate, and Wooden Plank.
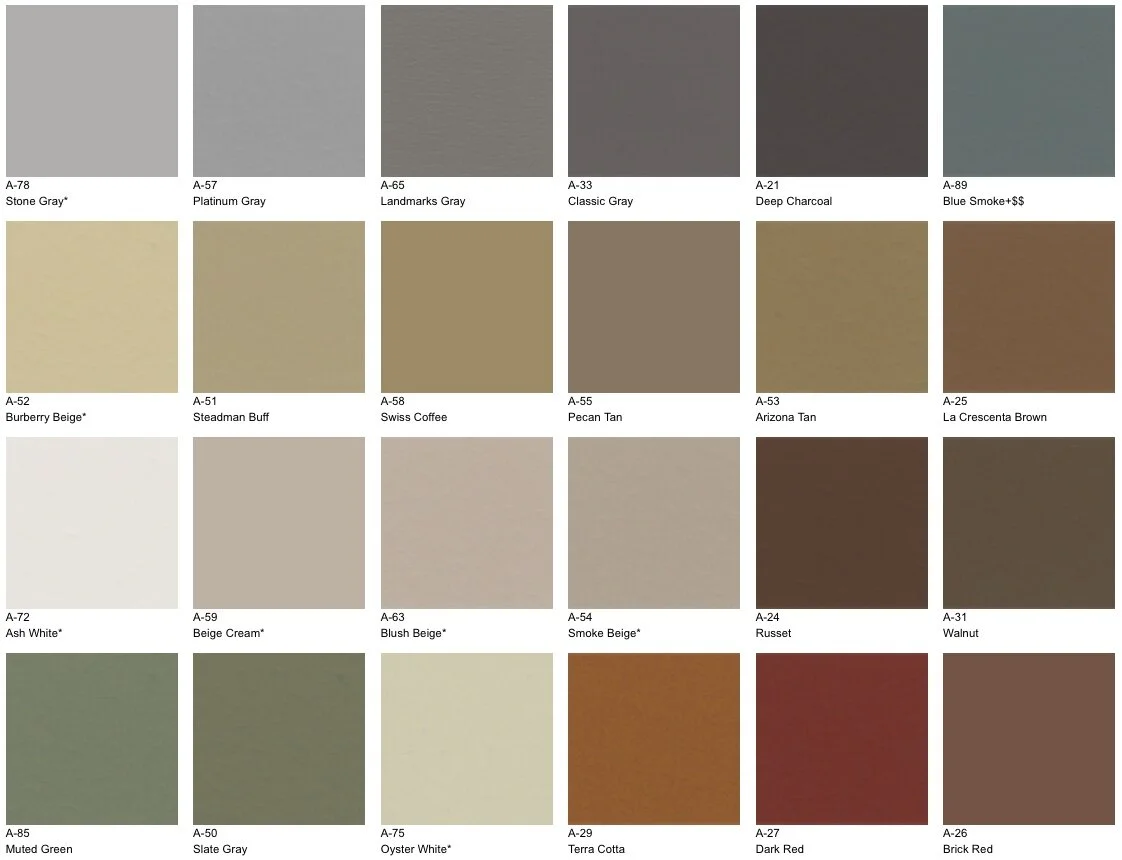
Step 2. Choose a color.
Once you have your pattern picked, it’s time to choose a base and a release color. Release powder is used to prevent the rubber stamps from sticking to the concrete surface. A good tip is to choose a release color a shade or two darker than your base color to achieve a two tone look. We only use integral color, which is mixed directly into the concrete mix. This ensures you get a consistent color throughout the entire slab. Click Here for the most up-to-date color chart.
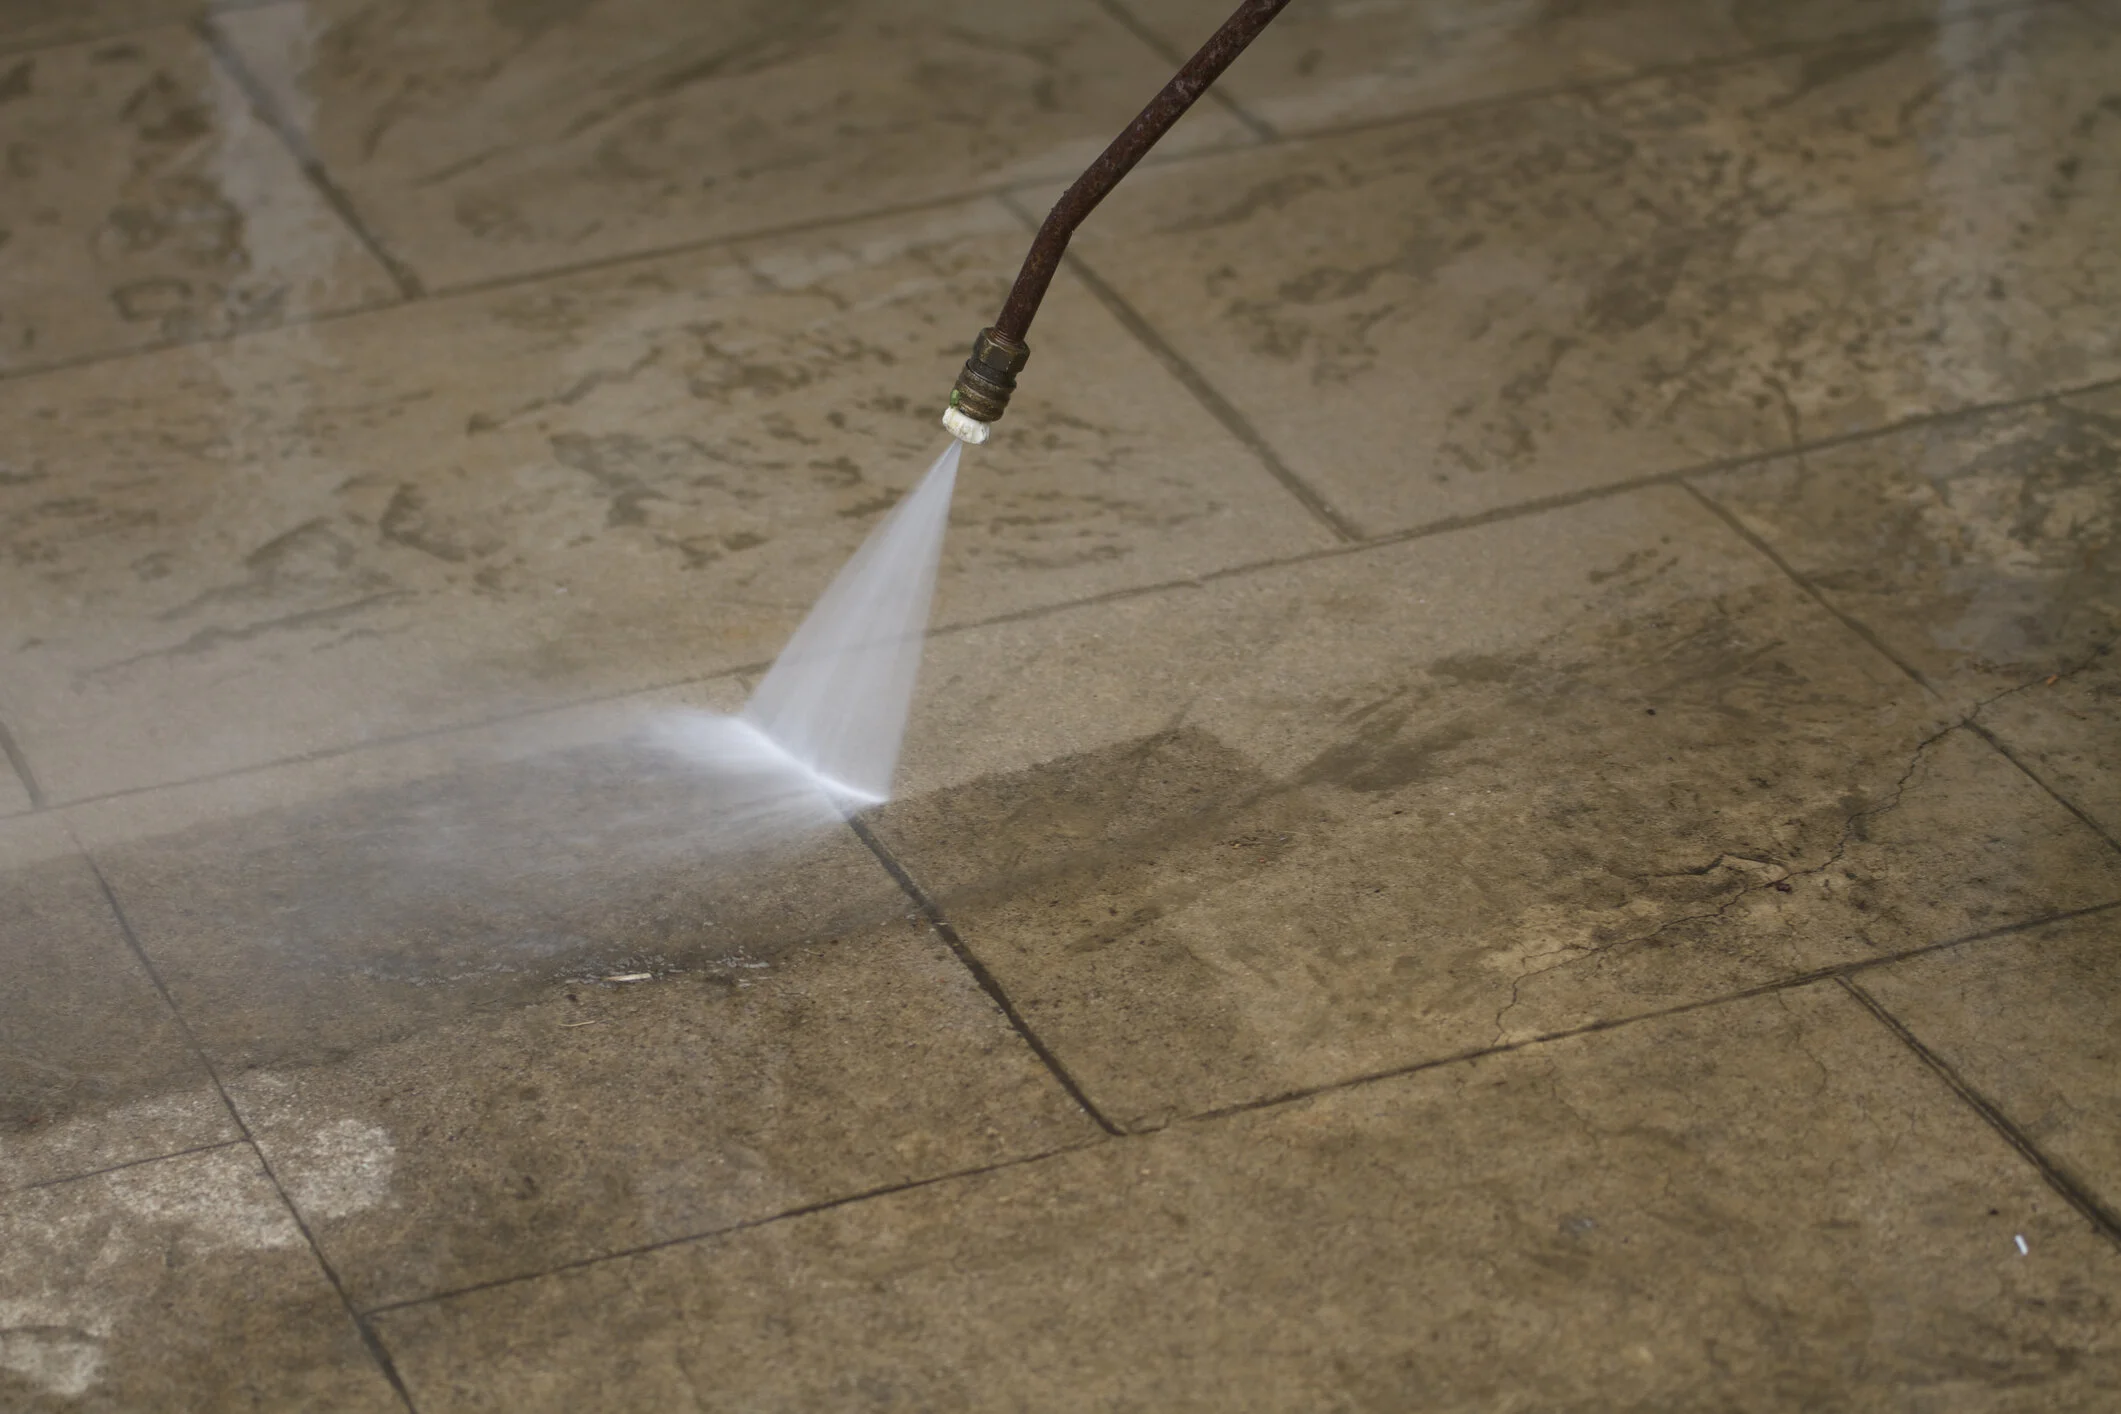
Step 3. Power washing & sealing.
After your stamped concrete has cured for several days, (typically 5-7 days depending on weather) we will then come back to power wash and apply a coat of sealer.
Caring for your stamped concrete.
Your stamped concrete will need to undergo regular maintenance every 2-3 years. This usually just means power washing the concrete and rolling on a fresh coat of sealer. This is a simple project that most of our customers decide to undertake on their own, but we are happy to provide regular maintenance to your stamped concrete at an additional cost.